WebService应用4-与Spring整合
Spring作为一个万能框架,能够将许多的第三方框架整合到一起
Server端整合
创建webServer子项目
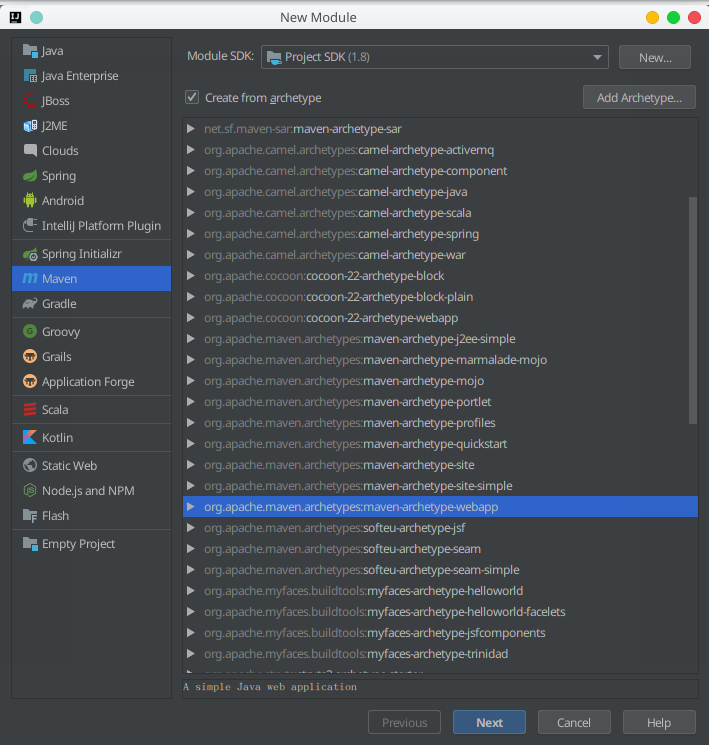
首先,进入父项目,右键点击父项目名,选择New->Moudle,然后进入以下界面
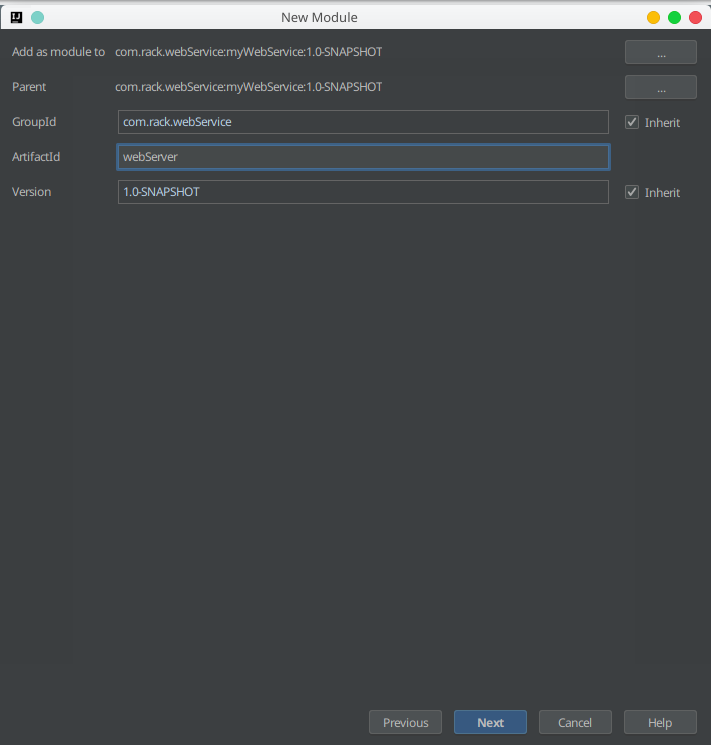
之后,填入子项目名
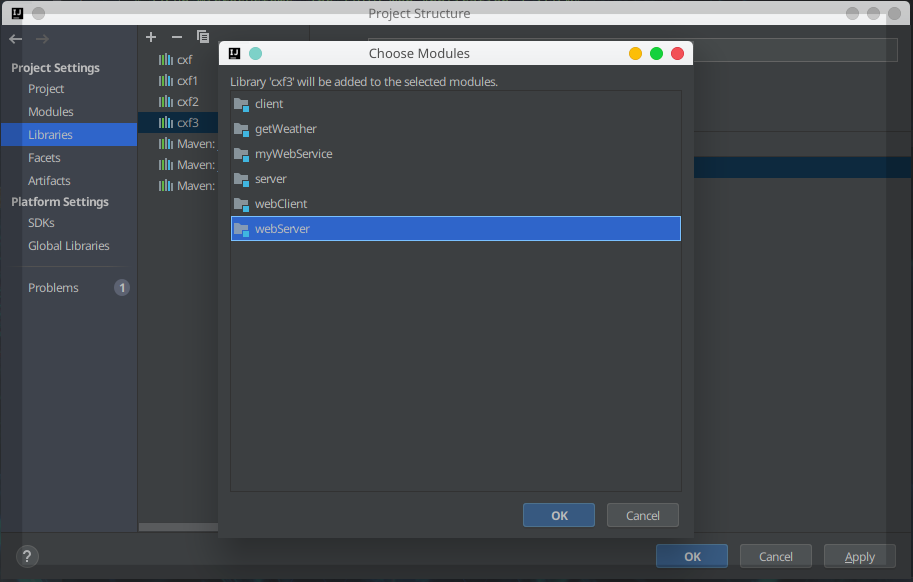
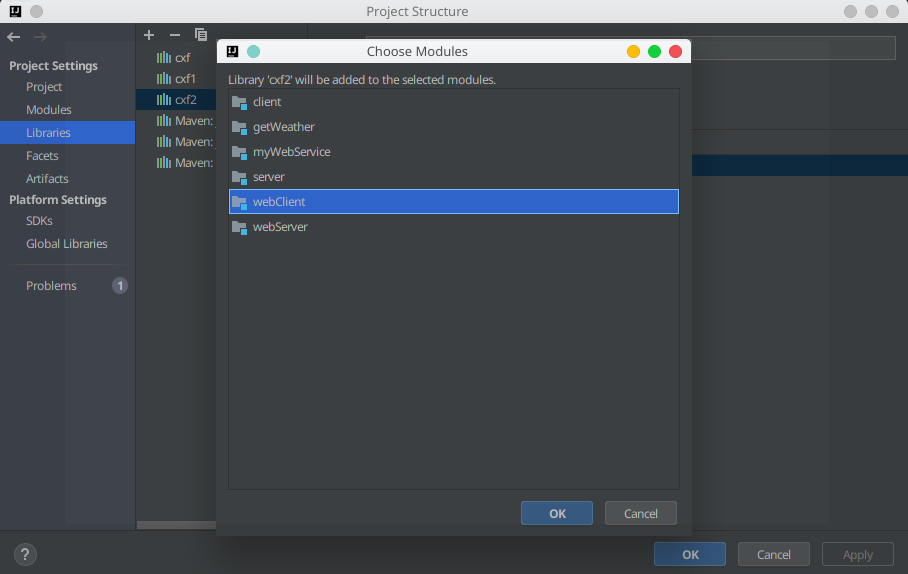
然后,点击File->Project Structure->Libraies,点击+,然后点击其中的Java项,获得以下界面,点击选中项,导入需要的java库
创建intercepter和server包
将server项目中的intercepter和server包完整复制过来就行了。
编辑web.xml文件
1
2
3
4
5
6
7
8
9
10
11
12
13
14
15
16
17
18
19
20
21
22
23
24
25
26
27
28
29
<!DOCTYPE web-app PUBLIC "-//Sun Microsystems, Inc.//DTD Web Application 2.3//EN" "http://java.sun.com/dtd/web-app_2_3.dtd" > <web-app > <display-name > Archetype Created Web Application</display-name > <context-param > <param-name > contextConfigLocation</param-name > <param-value > classpath:bean-cxf.xml</param-value > </context-param > <listener > <listener-class > org.springframework.web.context.ContextLoaderListener</listener-class > </listener > <servlet > <servlet-name > CXFServlet</servlet-name > <servlet-class > org.apache.cxf.transport.servlet.CXFServlet</servlet-class > <load-on-startup > 1</load-on-startup > </servlet > <servlet-mapping > <servlet-name > CXFServlet</servlet-name > <url-pattern > /*</url-pattern > </servlet-mapping > </web-app >
cxf配置文件
从cxf包中复制出cxf的三个配置文件,分别为:
Spring配置文件
创建Spring的配置文件bean-cxf.xml
编辑Spring的配置文件bean-cxf.xml
1 2 3 4 5 6 7 8 9 10 11 12 13 14 15 16 17 18 19 20 21 22 23 <beans xmlns ="http://www.springframework.org/schema/beans" xmlns:xsi ="http://www.w3.org/2001/XMLSchema-instance" xmlns:jaxws ="http://cxf.apache.org/jaxws" xsi:schemaLocation =" http://www.springframework.org/schema/beans http://www.springframework.org/schema/beans/spring-beans.xsd http://cxf.apache.org/jaxws http://cxf.apache.org/schemas/jaxws.xsd" > <import resource ="classpath:cxf.xml" /> <import resource ="classpath:cxf-extension-soap.xml" /> <import resource ="classpath:cxf-servlet.xml" /> <jaxws:endpoint address ="http://127.0.0.1:8080/myWebService/rack" implementor ="webService.server.UserService" serviceName ="userService" > <jaxws:inInterceptors > <bean class ="webService.intercepter.ServerIntercepter" > </bean > </jaxws:inInterceptors > </jaxws:endpoint > </beans >
更改测试文件
1
2
3
4
5
6
7
8
9
10
11
12
13
package webService.server;import org.springframework.context.support.ClassPathXmlApplicationContext;public class TestApp public static void main (String[] args) ClassPathXmlApplicationContext context = new ClassPathXmlApplicationContext("classpath:bean-cxf.xml" ); context.start(); } }
最终测试结果
1
2
3
4
5
6
7
8
9
10
11
12
13
14
15
16
17
18
19
20
21
22
五月 28, 2019 10:23:36 下午 org.springframework.context.support.AbstractApplicationContext prepareRefresh 信息: Refreshing org.springframework.context.support.ClassPathXmlApplicationContext@51521cc1: startup date [Tue May 28 22:23:36 CST 2019]; root of context hierarchy 五月 28, 2019 10:23:36 下午 org.springframework.beans.factory.xml.XmlBeanDefinitionReader loadBeanDefinitions 信息: Loading XML bean definitions from class path resource [bean-cxf.xml] 五月 28, 2019 10:23:37 下午 org.springframework.beans.factory.xml.XmlBeanDefinitionReader loadBeanDefinitions 信息: Loading XML bean definitions from class path resource [cxf.xml] 五月 28, 2019 10:23:38 下午 org.springframework.beans.factory.xml.XmlBeanDefinitionReader loadBeanDefinitions 信息: Loading XML bean definitions from class path resource [cxf-extension-soap.xml] 五月 28, 2019 10:23:38 下午 org.springframework.beans.factory.xml.XmlBeanDefinitionReader loadBeanDefinitions 信息: Loading XML bean definitions from class path resource [cxf-servlet.xml] 五月 28, 2019 10:23:40 下午 org.springframework.beans.factory.support.DefaultListableBeanFactory preInstantiateSingletons 信息: Pre-instantiating singletons in org.springframework.beans.factory.support.DefaultListableBeanFactory@29ca901e: defining beans [cxf,org.apache.cxf.bus.spring.BusWiringBeanFactoryPostProcessor,org.apache.cxf.bus.spring.Jsr250BeanPostProcessor,org.apache.cxf.bus.spring.BusExtensionPostProcessor,org.apache.cxf.binding.soap.SoapBindingFactory,org.apache.cxf.binding.soap.SoapTransportFactory,org.apache.cxf.binding.soap.customEditorConfigurer,org.apache.cxf.jaxws.EndpointImpl--683175349]; root of factory hierarchy 五月 28, 2019 10:23:41 下午 org.apache.cxf.service.factory.ReflectionServiceFactoryBean buildServiceFromClass 信息: Creating Service {http://www.springframework.org/schema/beans}userService from class webService.server.IUserService 五月 28, 2019 10:23:42 下午 org.apache.cxf.endpoint.ServerImpl initDestination 信息: Setting the server's publish address to be http://127.0.0.1:8080/myWebService/rack 五月 28, 2019 10:23:42 下午 org.eclipse.jetty.server.Server doStart 信息: jetty-7.5.4.v20111024 五月 28, 2019 10:23:43 下午 org.eclipse.jetty.server.AbstractConnector doStart 信息: Started SelectChannelConnector@127.0.0.1:8080 STARTING 五月 28, 2019 10:23:43 下午 org.eclipse.jetty.server.handler.ContextHandler startContext 信息: started o.e.j.s.h.ContextHandler{/myWebService,null}
Client端整合
创建webClient子项目
首先,进入父项目,右键点击父项目名,选择New->Moudle,然后进入以下界面
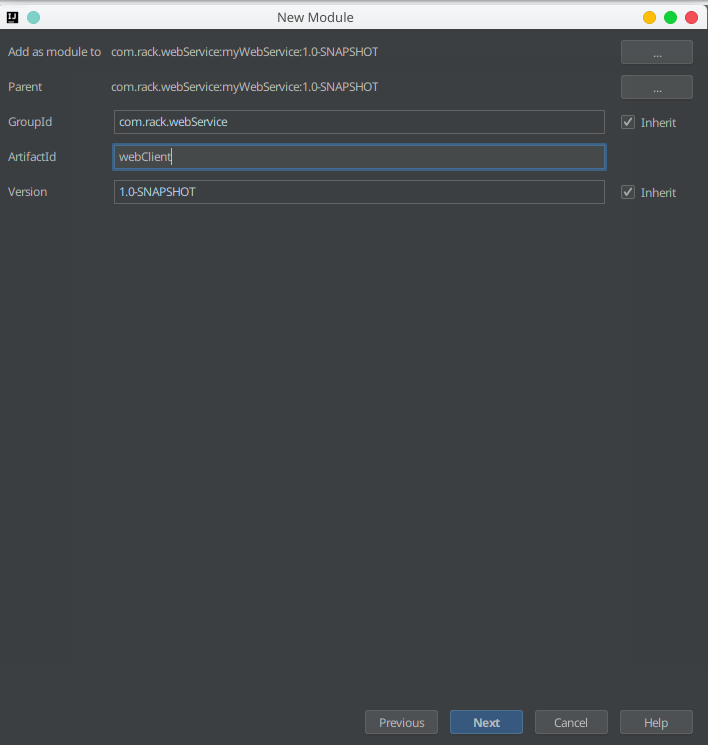
之后,填入子项目名
然后,点击File->Project Structure->Libraies,点击+,然后点击其中的Java项,获得以下界面,点击选中项,导入需要的java库
创建包
将client项目中的intercepter和client完整复制过来就行了。
重新生成server包
1
2
cd /home/share/workspace/myWebService/web-Client/src/main/java/ wsimport -keep http:
编辑web.xml文件
1
2
3
4
5
6
7
8
9
10
11
12
13
14
15
16
17
18
19
<!DOCTYPE web-app PUBLIC "-//Sun Microsystems, Inc.//DTD Web Application 2.3//EN" "http://java.sun.com/dtd/web-app_2_3.dtd" > <web-app > <display-name > Archetype Created Web Application</display-name > <context-param > <param-name > contextConfigLocation</param-name > <param-value > classpath:bean-cxf.xml</param-value > </context-param > <listener > <listener-class > org.springframework.web.context.ContextLoaderListener</listener-class > </listener > </web-app >
cxf配置文件
从cxf包中复制出cxf的三个配置文件到resources资源目录中,分别为:
Spring配置文件
创建Spring的配置文件bean-cxf.xml
编辑Spring的配置文件bean-cxf.xml
1 2 3 4 5 6 7 8 9 10 11 12 13 14 15 16 17 18 19 20 21 22 <beans xmlns ="http://www.springframework.org/schema/beans" xmlns:xsi ="http://www.w3.org/2001/XMLSchema-instance" xmlns:jaxws ="http://cxf.apache.org/jaxws" xsi:schemaLocation =" http://www.springframework.org/schema/beans http://www.springframework.org/schema/beans/spring-beans.xsd http://cxf.apache.org/jaxws http://cxf.apache.org/schemas/jaxws.xsd" > <jaxws:client address ="http://127.0.0.1:8080/myWebService/rack?wsdl" serviceClass ="org.springframework.schema.beans.IUserService" name ="userService" > <jaxws:outInterceptors > <bean class ="webservice.intercepter.ClientIntercepter" > <constructor-arg name ="userName" value ="rack" > </constructor-arg > <constructor-arg name ="password" value ="123456" > </constructor-arg > </bean > </jaxws:outInterceptors > </jaxws:client > </beans >
更改测试类
1
2
3
4
5
6
7
8
9
10
11
12
13
14
15
16
17
package webservice.client;import org.springframework.context.support.ClassPathXmlApplicationContext;import org.springframework.schema.beans.IUserService;public class TestApp public static void main (String[] args) ClassPathXmlApplicationContext context = new ClassPathXmlApplicationContext("classpath:bean-cxf.xml" ); IUserService userService = context.getBean(IUserService.class); String str = userService.getStr("hello" ); System.out.println(str); } }
最终测试结果
lang 1 2 3 4 5 6 7 8 9 五月 29, 2019 12:25:48 下午 org.springframework.context.support.AbstractApplicationContext prepareRefresh 信息: Refreshing org.springframework.context.support.ClassPathXmlApplicationContext@51521cc1: startup date [Wed May 29 12:25:48 CST 2019]; root of context hierarchy 五月 29, 2019 12:25:48 下午 org.springframework.beans.factory.xml.XmlBeanDefinitionReader loadBeanDefinitions 信息: Loading XML bean definitions from class path resource [bean-cxf.xml] 五月 29, 2019 12:25:49 下午 org.springframework.beans.factory.support.DefaultListableBeanFactory preInstantiateSingletons 信息: Pre-instantiating singletons in org.springframework.beans.factory.support.DefaultListableBeanFactory@73ad2d6: defining beans [userService.proxyFactory,userService]; root of factory hierarchy 五月 29, 2019 12:25:50 下午 org.apache.cxf.service.factory.ReflectionServiceFactoryBean buildServiceFromClass 信息: Creating Service {http://server.webService/}IUserServiceService from class org.springframework.schema.beans.IUserService 加工后的数据:hello
![webserver1]()
![webserver2]()
![webServer3]()
![webService4]()
![webclient1]()
![webclient2]()
![webClient3]()
